In honor of the impending release of “Star Wars: The Rise of Skywalker,” the third film in the third trilogy, I decided to use PTC Mathcad to answer a few questions about the original ultimate super weapon: The Death Star.
I’ve always wondered how cramped people were on the Death Star. A buddy of mine from work took me on a tour of the nuclear attack submarine he served on in the US Navy, and he lived with two other lieutenants in a space the size of my bathroom. The director of “Star Trek 2: The Wrath of Khan” gave a talk at work and explained that he tried to convey the feeling of people being crammed in confined spaces like World War II movies.
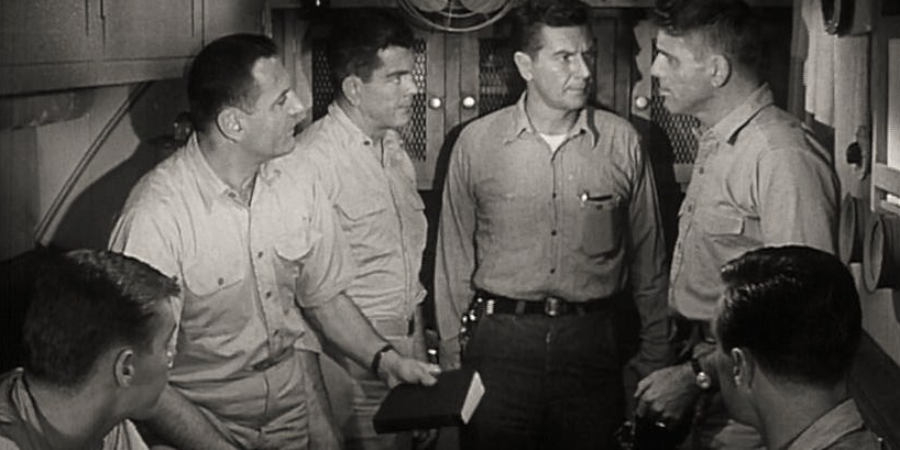
Scene from 1958 submarine film, Run SIlent, Run Deep.
I calculated the population density using a variety of different methods, and finally settled on one that measured the surface area of the 4 decks located a distance below the thick armored plating. That puts 1.19 million people over 62,850 square miles, for a population density of just over 19 people per square mile.
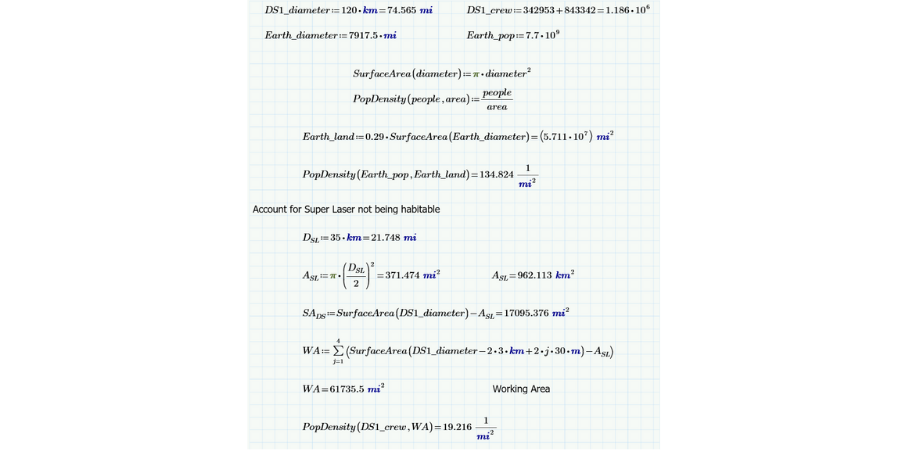
Death Star calculations presented in PTC Mathcad.
For reference, the Earth has a population density of 134.8 people per square mile of land. If the Death Star were a country, it would rank below 194 of the 232 countries.
Why does this matter? The lack of people explains why four humans, a Wookiee, and two droids were able to travel relatively freely through the battle station without getting caught.
The Death Star has a vast series of horizontal and vertical elevators for travelling from one place to the other. But the interior of the Death Star is largely taken up by the hypermatter reactor, superlaser, hyperdrive, and ion sublight engines. Often when people are trying to get between locations, rather than take an elevator, they will actually fly from one hangar bay to another because it’s faster.
Let’s say that you have a meeting on the exact opposite side of the Death Star from where you are, and you decide to fly a TIE fighter there. Let’s see how long it would take:
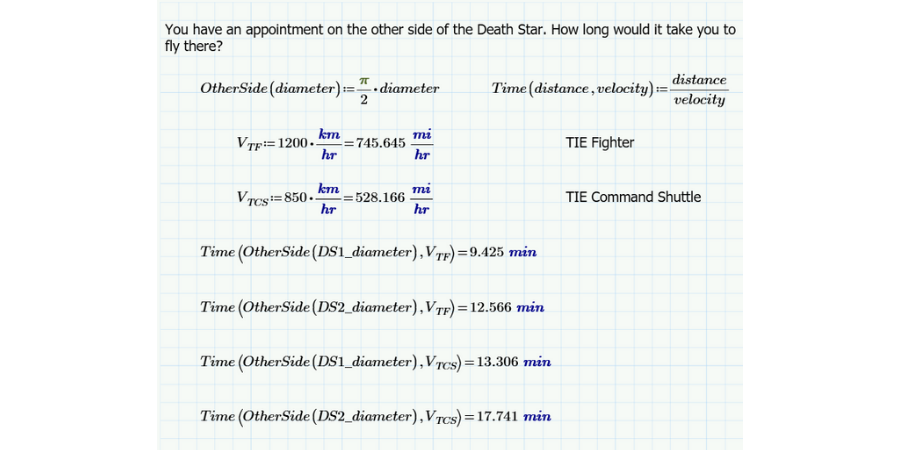
Travel calculations for Death Star.
You can be on the other side of the first Death Star in less than 10 minutes and under 13 minutes for the second Death Star. Most people on the Death Star aren’t TIE fighter pilots, so the dignitaries would most likely be taking a TIE command shuttle, which has a lower velocity. In that situation, it would take just under 14 minutes for Death Star I and 18 minutes for Death Star II.
Arrogance and hubris were two of the greatest weaknesses for the Death Star.
The rebel forces attacked the Death Star with merely 30 fighters: 8 Y-Wing bombers and 22 X-Wing fighters. The Death Star has over 7000 TIE Fighters. If only a third of those are available at any time due to maintenance and flight crew availability, imperial forces had an overwhelming air superiority of over 77 to 1.
The Empire planned the Death Star as a weapon of fear and intimidation. Sure, the superlaser could destroy an entire planet, but the first Death Star could fire only once every 24 hours. The rest of the weapons – ion cannons, turbolasers, and laser cannons – were designed more to engage with capital ships and ships of the line, rather than snub fighters.
But here’s the thing: The Death Star didn’t have many of these weapons. There were 20,000 of these other weapons, but when you look at their distribution across the surface area (not including the superlaser), you have one every 0.855 square mile, which is a square with sides of 0.92 miles.
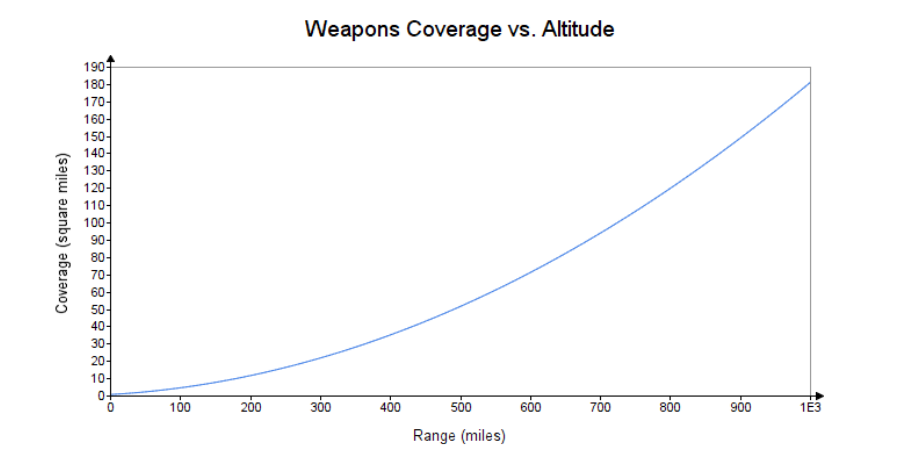
The area that they have to cover increases by the square with altitude (and of course the volume increases at a cubic rate). If you’re a gun crew and you’re engaging targets at a distance of 1,000 miles, the sector you have to cover is 181 square miles. Here’s a chart from PTC Mathcad showing the coverage area for each weapon as a function of the distance from the Death Star surface:
The problem with such a huge weapon is that you have a huge space to defend and huge sectors of fire that you have to attack, and the Death Star lacked firepower to do so.
When you do the math, you realize the Death Star was actually a terrible design with significant security and operational issues. No wonder such a small group of rebels at a technological disadvantage were able to take it out twice.

The technical readouts used for this article come from Imperial Death Star: DS-1 Orbital Battle Station: Owner’s Workshop Manual, and TIE Fighter: Owner’s Workshop Manual, by Ryder Windham, Chris Reiff, and Chris Trevas.
Dave Martin is a Creo, Windchill, and PTC Mathcad instructor and consultant. He is the author of the books “Top Down Design in Creo Parametric,” “Design Intent in Creo Parametric,” and “Configuring Creo Parametric,” all available at amazon.com. He can be reached at dmartin@creowindchill.com.
Dave currently works as the configuration manager for Elroy Air, which develops autonomous aerial vehicles for middle-mile delivery. Previous employers include Blue Origin, Amazon Prime Air, Amazon Lab126, and PTC. He holds a degree in Mechanical Engineering from MIT and is a former armor officer in the United States Army Reserves.